ECE Filebox
From CVL Wiki
Using the ECE Filebox
- The ECE Filebox provides every user with a remote-mountable home directory that is backed up daily for 31 days. You can access this home directory over the network using SSH or an SMB client. All off-Campus use requires a VT VPN connection.
Filebox Webpage
- Files placed in the public_html folder in your home directory can be access directly from a web broswer at: http://filebox.ece.vt.edu/~USERNAME
See Password lock a web page to add VT PID login protection to your ECE filebox web access.
Windows XP
1. Open Windows Explorer [Start -> My Computer] and open the Tools menu -> Map Network Drive...
2. In the Folder dialog box type: \\filebox.ece.vt.edu\YOUR_USERNAME .
3. Check Reconnect at Logon.
4. Click on the Connect using a different user name. link.
5. Enter your ECE username and password and hit OK.
6. Click Finish.
- NOTE: If you already have a network drive open to filebox.ece.vt.edu, you must put in the IP address (128.173.88.43) in place of 'filebox.ece.vt.edu'. Example: \\128.173.88.43\USERNAME\
Windows Vista/7
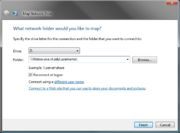
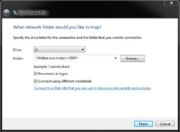
1. Open Windows Explorer [Start -> Computer] and click on 'Map Network Drive' in the top bar In the Folder dialog box type: \\filebox.ece.vt.edu\USERNAME\ .
2. Check Reconnect at Logon.
3. Check Connect using different credentials.
4. Click Finish.
5. Enter your ECE username and password and hit OK.
- NOTE: If you already have a network drive open to filebox.ece.vt.edu, you must put in the IP address (128.173.88.43) in place of 'filebox.ece.vt.edu'. Example: \\128.173.88.43\USERNAME\
Mac OS X
1. Open a Finder window.
2. In the top menu bar, open Go -> Connect to Server...
3. In the Server Address dialog box type: smb://YOUR_USERNAME@filebox.ece.vt.edu/YOUR_USERNAME
4. Click Connect.
Linux
- File Transfer is typically done using the SCP command.


