X11
From CVL Wiki
(Difference between revisions)
(→Installing X11) |
|||
| Line 1: | Line 1: | ||
== Installing X11 == | == Installing X11 == | ||
| − | '''Mac OS X''' | + | '''Mac OS X 1.4 (Tiger)''' |
| + | *note: X11 is installed by default in Mac OS X 10.5 (Leopard) | ||
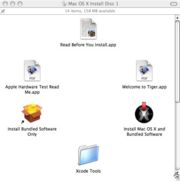
[[Image:X11_os_x_install_1.jpg|thumb|(fig.1) Browsing the Mac OS X Install Disk 1]] | [[Image:X11_os_x_install_1.jpg|thumb|(fig.1) Browsing the Mac OS X Install Disk 1]] | ||
Revision as of 17:32, 26 February 2008
Installing X11
Mac OS X 1.4 (Tiger)
- note: X11 is installed by default in Mac OS X 10.5 (Leopard)
Insert your Mac OS X Install Disk 1 into the computer, and double click the CD icon that appears on your desktop.
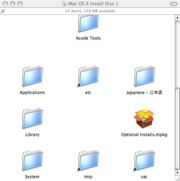
In the Finder window, SCROLL DOWN and double click on the Optional Installs.mpkg* icon. (see fig.2)
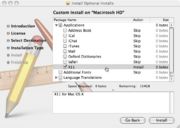
Read the intro, accept the license and select the destination hard drive. In the next page, expand Applications and select X11 (See fig.3).
Click Install.
- If you do not have the Mac OS X Install Disk, you can download the Optional Installs.mpkg HERE
Windows
X11 on Windows is part of the Cygwin package, click here for installation instructions.
Linux
X11 is installed by default on all standard Linux/Unix installations.


